Sunday, February 27, 2011

Found It, Found It

I knew it was there someplace. After all, how could it disappear? It's not like it could leave, you know. I just had to keep digging and I would find it.

I had two rooms and the hallway full of boxes, and bags and miscellaneous piles when I finally saw it in sight. There it was.


The back of the closet.

What I didn't find was the unfinished project that I was hoping to find along the way. I did find other projects which may distract me as ideas start popping into my head. Some reorganization was definitely in order.  What will I finish?  Should I save this? What should I do with that? 

I found ten perfectly good pair of jeans that I was once going to make a jacket or several jackets from considering the amount saved. I no longer find this idea as appealing as I once did so tomorrow, the jeans are going to Goodwill. Hopefully, someone else can use them and I will have new space in my closet.


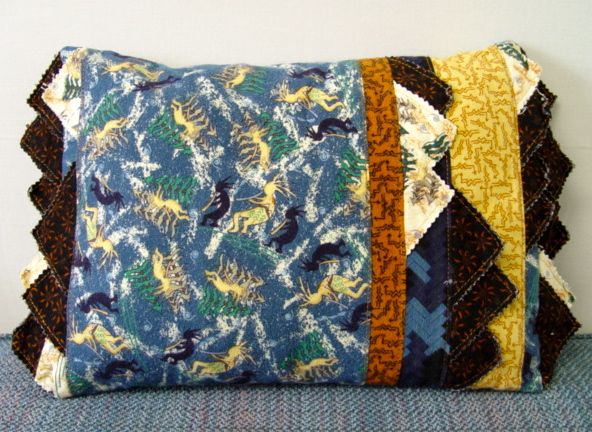
What led to the closet search and cleaning? Well, I was looking for that project (a pillow, no less). Did I discover it in my search for the back of the closet? No. But there are more boxes and corners I can search.............

Friday, February 25, 2011

It's Been Framed

Open Sew Meets Laundry Day
15" x 19"
Sharon V. Rotz

Now that it's time to finish my quilting project, I thought it was time to try a new approach.

Instead of a traditional binding, I wanted to attempt an organic, curving edge. This could be finished off with a satin stitched edge.......... at least, it could in my head. The first step was to free motion stitch a curving line that would be my edge. I then did a open zigzag stitch over the line. The edge was trimmed as close as possible to the zigzagging. The final dense satin stitching was done over the previous stitching to complete the quilt edge.

Was I now done?

What would happen if I layered this onto another fabric, as if I was mounting my organic quilt onto a frame?

After tearing into my fabric stash, I came up with a batik that made my little quilt sing. Because my original quilt was already quilted, my border had to be quilted as well. I ended up basically making another quilt, complete with batting and quilting which would serve as my frame. The little quilt was pinned and topstitched to the center of the batik quilt. I am now finished.

Would there be another way to achieve the same effect? Of course, there is always another way. But sometimes, one step just leads to another and another. It's the fun of the adventure that lures us on.

Tuesday, February 22, 2011

From Fabric Sketch to Quilted Project


Things were shaping up with my design and I decided to transfer the elements onto white fabric because I liked the sharp contrast with my white table where I was working. Working on another color would completely change the colors of the translucent dryer sheet sections. This could be very dramatic in another project, but not today.

After positioning the elements with basting glue and a few pins, I layered the quilt top to the batting and backing. Appliquing (That term doesn't flash into my head when looking at this, but isn't it?) and quilting will be done in one step as I secure the pieces with my quilting stitches.

Some of the threads chosen for the quilting were wonderful shiny and sparkly metallic threads. These can be troublesome and lead to hair-pulling trauma when we are fighting with breaking threads. Liz Kettle offers great tips for using metallic threads on the Quilting Arts blog. I tackled my project and smiled as I finished the quilting.

Now what's next? Will I finish with a traditional binding? Or is there another option hiding out there, just waiting to be tried?

Sunday, February 20, 2011

Sketching with Fabric


Touching pencil and paper is certainly the approved method of sketching, but could sketching be done with fabric instead?

For me, it's fun touching and playing with the elements of my design.  Here I have spare triangles left from another project, some sections of dryer sheets that I painted with Dye-na-Flow paints and some Dove metallic candy wrappers that are cut or formed into circles.

How can these be arranged into a pleasing composition?  Are the parts too different?  Will they work together? I'm pushing myself to experiment with various elements. Outside of the box? Or just starting to push and shove and break down the edges of that box to make room for expansion?

What will come from this? Will I go forward or will I squash it all back in the box and sit on the top?

Thursday, February 17, 2011

What is in Your Sketchbook?

Do you sketch? Do you plan your projects? Do you make working drawings that are colored, or filled with swatches of fabrics that you will use?

I have to admit that this is my downfall. These are the steps that I want to skip so I can jump right in to cutting and arranging the fabric. I want to get things done. These other steps seem too much like practice and I don't like to practice (much to the dismay of my music teachers all those years ago). I like to think that I practice in my head as those ideas go tumbling around and around.

I am working on it. For the past year, I have been working in a sketchbook, at least taking minor steps to draw, arrange and plan some of my work before I attack the fabric. Is this approach as much fun as rambling around, tossing fabric in the air and hoping it comes down "artfully"? As they say, the jury is out.


Sketchbook drawing
Marigolds

Wednesday, February 16, 2011

Spring Fever


Maybe its the warmer weather we've been having the last few days or maybe its the seed catalog that just came in the mail, but I've been thinking of summer. Last year I captured these marigolds that brightened my yard and I just love the color and the contrast between the shapes of the flower petals and the leaves.

Don't they inspire you? I think a new quilt design could be in the making. Will I find fabric to compliment my vision? Would applique be the best choice or could some piecing be involved? Today, my imagination will fly and maybe tomorrow there will be a sketch and a plan.

What are your suggestions?

Monday, February 14, 2011

Saturday, February 12, 2011

WOWSPACE The Art of the Quilter


If you are ready for a week-end adventure, a central Wisconsin destination is WOWSPACE gallery in Wittenberg, WI. This juried quilt show presents a wonderful variety of quilting types, from traditional to contemporary. 

"Bed quilts, wall hangings and wearable art, the artistic creations of more than 25 Wisconsin quilters, delight the eye with a riot of color and design accompanied by fine stitchery." states Susan Hanson, coordinator of the event.


Friday, February 11, 2011

Pillows, Pillows, Over the Top

How could I NOT include a serged pillow in my pillow collection?  Although I have more, these favorites lead the way.  Could it be that I just can't resist the bright colors and exciting fabric designs? You can be the judge.

After finishing my quilt "Thirteen's a Charm", included in Serge and Merge Quilts, I fortunately had a few pieces left over. Since this quilt is one of my very favorites, I wanted to add to its splendor by accenting it with pillows. Four blocks became a pillow top and a few of the fun prairie points poke out of the pillow edge.

And still I had fabric left, how lucky was I? Not enough to make more of the same design, another break.  I had the opportunity to once again think in a new direction.  What new design would work with my serged strips?


I decided to crosscut the strips into bars, various widths to add variety. What fabric could be added between?  Perhaps a crisp white for a sharp, fresh look. This seemed to be working.


Yes, indeed, I was more than pleased with my Serged Bar Pillows. They are, without a doubt, my new favorite especially when I add my "Thirteen's a Charm" pillow.


And, with that addition, the pile got just too high and my pillow world came tumbling down.


Wednesday, February 9, 2011

Pillows Reaching the Sky


Yes, we are reaching the sky. The pillows are precariously perched and we are still moving on.

We have looked are various pillow edges but one we have not encountered is the flanged pillow. This flange can be compared to a "flat ruffle", (if that even makes sense) and gives a more contemporary look.


The"Joy Patchwork Pillow" from Quilting Through the Seasons is finished with a flange.  It certainly adds to the pillow, both in size and in design. This looks like a complicated finish for a pillow and the first time I tried this, I did make it, oh, so hard.  I made four sides and stitched them into a frame and then tried to figure out how to add them to the sides of my pillow. EEK, what problems, I had.

Today, I can tell you a simple way to achieve this look. Think of the pillow top as the center of a quilt and add four (pieced) borders onto the "quilt top".  

Measure the "quilt top" (3" border, 12" center, 3" border plus seam allowance, 1/2" equals 18-1/2") and construct your back this size. Make your pillow back with an center overlap (envelope style) and pin right sides together to the pillow front. Stitch around the pillow. 

Turn the pillow to the right side through the overlapped back closure. Press. Stitch in the ditch between the patchwork borders and the pillow center to form the flange pillow edge.


Monday, February 7, 2011

How High Can the Pillows Go?

While we are savoring our Packers victory in the Super Bowl, I am still piling pillows up higher and higher.

Today, I've gathered my scraps strips. We often have extra strips of fabrics left over when we work on a project. These become orphans in our stash, too good to throw away and not enough to make anything. When my pile of strips gets big, I start making "freedom blocks", log cabin blocks of various colors and width of strips. These are recut to a common size and make wonderful, zany quilt blocks. The full instructions are in my book, Log Cabin Quilts with Attitude.


To go even further, you can make a lively butterfly pillow to brighten your room and coordinate with your bed quilt. Four blocks were made from excess strips from the quilt. These were cut into rectangles and stitched into a four-patch. I added a bit of rickrack on the to edge of the pillow as I stitched the front and the back together. A wired ribbon is wrapped around the pillow and ends are twisted to make the butterfly antennas.


Today, take a look at your scraps and see what you can make.

Saturday, February 5, 2011

Piling Pillows Higher and Higher

Making a pillow can be a small experiment with creativity. Perhaps, you want to try a technique without working on a grand project.


I love crazy quilts but never have the time or enough of the fabrics, the velvets and silks, to make a large quilt. Making a crazy quilt pillow was the solution for me. I thoroughly enjoyed the patchwork and the hand embroidery stitching. I have my small pillow completed but I'm still dreaming of that large crazy quilt I will make someday in the future.


Sunshine and warm summer days, these are the ideas that came to mind when I saw this gay sunflower fabric. Why not decorate with a giant sunflower and bring the summer day inside my home? This pillow became the star with a cast of "Sunflower Cube" pillows and of course, a wall quilt to match. My, did I really work backward, making the pillows first and then the quilt? Instructions for this project are in my book, Quilting Through the Seasons.


As you can see the pillow pile is reaching ever upward. 

Friday, February 4, 2011

And the Pillow Pile Grows


Do you have left over triangles from your project? 

Here are two options for using them to make decorator pillows to match your quilt. After making large flying geese blocks, I had flannel triangles that I cut from the corners. I pieced these together and cut them to size to fit a common pillow form (14" and 18"). These new triangle blocks can surround a large square or be set triangle block to triangle block as in the second example. 


For this pillow, I added a narrow strip of fabric around the triangles to achieve the size I needed for the pillow form.  This narrow strip also gave the illusion of a binding with less work.


For my third flannel pillow (scraps from a different quilt), I chose to try a pillow with a bit more character. I paired the triangles with the wrong sides together, top stitched the 90 degree corner and trimmed with pinking shears. I tucked these three dimensional triangles into seams on my pillow top and along the  long edges of the pillow. Instantly, a pillow with a jazzed up personality.

The pillow pile continues to grow. How high will we get?


Wednesday, February 2, 2011

More pillows

One lonely block can add a big punch with you make it into a decorator pillow. 

Here, I had extra fabric and made just one more block. After hand quilting it (using muslin as a backing), it became a eye-catching pillow top. A strip of rust fabric was wrapped around cording for the matching piping. A navy ruffle completes the edge. Pow! a great accent for your room.  


Another ruffle-edged pillow was made to match my Tuscanitily quilt. 

The pillow top was cut from a large print fabric and smokey black "ironwork" was machine appliqued around the edge. A narrow border substitutes for the piping, a simple solution to add color to the pillow edge. Again, the pillow top was quilted before the ruffle was attached. The look of a double ruffle can be easy to achieve by stitching together two strips of fabric. (The back strip is wider by 1-1/2" to make a 3/4" overlap unto the front.)

Have you added a ruffle to your latest pillow?

Don't forget to come back for more pillow ideas as my pillow pile starts to climb.
Related Posts Plugin for WordPress, Blogger...