Sunday, July 24, 2011

New Pattern


Branching Out 
48" x 65"
Sharon V. Rotz

I am proud to introduce my newest pattern "Branching Out". This lap size quilt features a simple design just perfect for featuring a favorite novelty print. Add simple stripped and slashed units to add complexity  to the large asymmetrical blocks. Show off your creativity as you chose different options when making your spacer blocks.

The fabric I have chosen for this quilt is "Opal Owl" by Free Spirit Fabrics. I love the whimsical look of the owls who-o-o-o (sorry, couldn't resist) peek out not only from the large blocks but from little corners scattered around the quilt.

As you can see if you've been following along my latest blogs that the same design elements are in this project. They have a totally different look when other fabrics are selected. What fabric choices will you make? Perhaps, a juvenile print for a child's room, an oriental print or a fabulous floral for serene garden view.

This pattern and others are available to you through my website.

Monday, July 18, 2011

Please, Do Not Touch


Please Do Not Touch.

How often have we been to quilt shows or exhibits and seen these words? Of course, it is meant to keep dirty little finger prints off precious handcrafted treasures.

But it is because of the very tactile nature of quilts that we are attracted to them. We love the feel of fabric and adore the relief of the quilting as it adds highlights and shadows to our work. Painters work hard to re-create that very look in their artwork.

As I was adding french knots (or more specifically, candlewicking knots) to my quilt, I found myself unconsciously rubbing my hand across the knots. I was so enjoying the texture I was creating.

I love color and fabric design so I usually feel connected to my quilting through sight. Today, I am connected to my work through the sense of touch.

Friday, July 15, 2011

Developing Personality


Now that I'm starting to add the quilting stitches, my project is developing it's personality. It is coming to life. I love to see the spirit of the quilt start to emerge as I work.


I've chosen to ignore the blocks entirely and quilt curving lines trailing across the entire top. I could have made many different thread choices for the quilting but found a perfect thread in my thread collection. How often does that happen?


This variegated thread picks up the colors of the fabrics, two of my favorite colors, chartreuse green and bright orange. (Probably why I couldn't resist purchasing the thread in the first place.) 

There are quilts where I have blended the thread so only the relief of the quilting shows. Today, both the thread color and the hills and valleys of the quilted areas will shine.

I hope you will come back again and see the progress as I continue my quilt journey.

Tuesday, July 12, 2011

Putting blocks together


I've decided to drop the block and add a spacer block at the top of the second row. Instead of making a large quilt with this block (that will come later) I'm going to only use the three blocks I have already completed. 

What can I do now? To balance the larger section on the left, I need to add to the right side. Also, to repeat the three squares in the spacer block, I think I'll add more squares to the bottom right.

What would happen if I just added free floating squares? Obviously, my three blocks are not going to make a bed quilt. This quilt will never be used to keep me warm so I can have fun with the shape.


More of the spacer squares in different border colors will add unity in a free-spirited way. These I will not bind but finish by stitching with the right sides together (batting included) and turning.


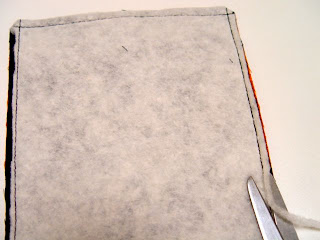
When stitching on top of the batting, it seems to work the best to stitch in the same direction. Rather than stitching around the piece, I stitched down both sides and then across the bottom. If there is any stretching in the batting, I am pushing it all in the same direction and there will be less twisting in my final piece.


It's important to trim as much of the batting  as possible away from the stitched edge to avoid a bulky edge.

The  best scissors I have for doing this are not my best scissors but a pair with a rounded tip that doesn't catch in the batting.


When the trimming is done, turn the piece to the right side and press. Obviously, in this case, the quilting will be done after the edge is finished.

Thursday, July 7, 2011

Arranging blocks


I'm now playing with the arrangement of my blocks. I like how they look when I place them vertically.


But I'm not a fan of the horizontal block-to-block setting. To me, the slashed unit on the top becomes too strong and I lose the look of the block.  What do you think?


How about if I drop the block?  Is this more interesting?


Tuesday, July 5, 2011

Where do I go from here?


Today, I'm back in my studio playing with my stripped and slashed units. I've put them together into this block. What do you think?  Do you see possibilities to use this asymmetrical block? Can you see this block put together with different fabrics?

I would like to hear your ideas. Please share your comments.

Come back soon to see the next step I take.
Related Posts Plugin for WordPress, Blogger...